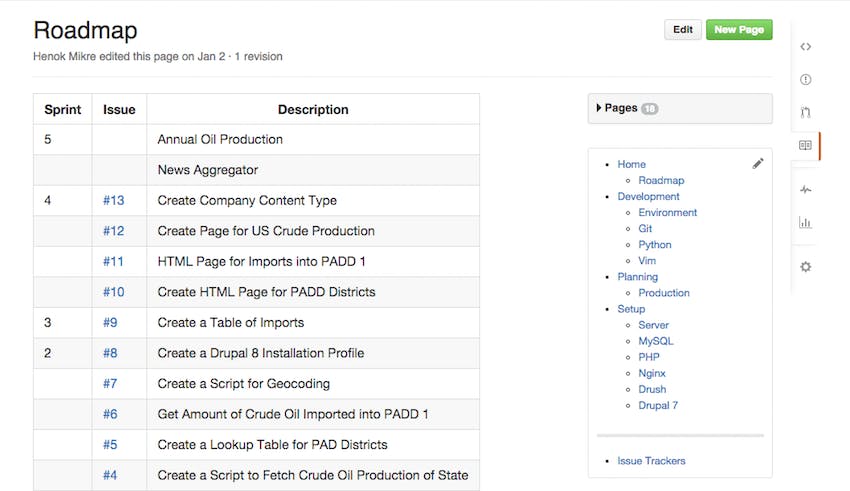
We use GitHub Wikis for planning and documentation. This makes sense for us because we use GitHub to manage almost all of our projects. Another major reason is that we prefer to use text files over binaries. Since GitHub Wikis support Markdown, we can easily create tables and checklists in our Wikis. Of course, that also means we can use Vim, Git and many of the other command line tools that we love.
Some organizations have turned wiki maintenance into an art form. GitHub has a showcase just on this subject. From the list, Netflix and Guard are probably the best.
For any repository hosted on GitHub, its wiki can be cloned by appending
.wiki at the end of the git URL. So, for our energyviz repository, it
would be:
{% highlight bash %} git clone git@github.com:blencorp/energyviz.wiki.git {% endhighlight %}
We like to organize our wikis, so we usually add _Sidebar.md to it. This allows us to override the default sidebar by manually re-arranging the content of the wiki. Here is a sample _Sidebar.md:
{% highlight bash %} About
- [[Home]]
Planning
- [[News]]
- [[Backlog]]
Tech Architecture
- [[Content-Types]]
- [[Taxonomy]]
Development
- [[Git-Workflow]]
- [[Servers]] {% endhighlight %}
Vundle and Vim-Markdown
Since we use Vim, it helps to have syntax highlighting for Markdown. We can use Vundle to install Vim-Markdown plugin:
- Install Vundle
{% highlight bash %} git clone https://github.com/VundleVim/Vundle.vim.git ~/.vim/bundle/Vundle.vim {% endhighlight %}
- Add the following at the top of your .vimrc:
{% highlight vim %} """"""""""""""""""""""""""""""""""""""""""""""""""""""""""""""""""""""""""""""" " Vundle Settings """"""""""""""""""""""""""""""""""""""""""""""""""""""""""""""""""""""""""""""" set nocompatible " be iMproved, required filetype off " required
" set the runtime path to include Vundle and initialize set rtp+=~/.vim/bundle/Vundle.vim
call vundle#begin()
" let Vundle manage Vundle, required Plugin 'VundleVim/Vundle.vim'
""""" Put your plugins here. Plugin 'godlygeek/tabular' Plugin 'plasticboy/vim-markdown'
" All of your Plugins must be added before the following line call vundle#end() " required filetype plugin indent on " required
" Disable folding let g:vim_markdown_folding_disabled=1 {% endhighlight %}
- After saving and existing .vimrc, run the following command:
{% highlight bash %} vim +PluginInstall +qall {% endhighlight %}
Vim should now properly identify our Markdown files.
Preview Locally
Since we were already used to working with Jekyll, we wondered if there was an easy way for us to preivew our wiki pages locally before pushing them to GitHub. There are a couple of tools that can do this, and we found gfms to be the best one for us. gfms stands for Github Flavored Markdown Server (GFMS).
gfms is powered by NodeJS, so we can use npm to install it:
{% highlight bash %} sudo npm install gfms -g {% endhighlight %}
We can then cd into our wiki dir and fire it up:
{% highlight bash %} cd ~/projects/energyviz.wiki/ gfms --port 9999 --api --no-api-on-reload {% endhighlight %}
One of the things we love about gfms is that it automatically refreshes the browser window when the file is saved.
You will notice that it writes out remaining API requests each time you save a file.
{% highlight bash %} GFMS 0.0.12 serving ~/projects/energyviz.wiki at http://localhost:9999/ - press CTRL+C to exit. Auto-updating CSS every 1d 0h 0m 0s 0ms. remaining API requests: 55 remaining API requests: 54 remaining API requests: 53 remaining API requests: 52 {% endhighlight %}
That is the number of requests you have remaining for unauthenticated requests. That is currently set at 60. You can check your limit with this command:
{% highlight bash %} curl -i https://api.github.com/users/{username} {% endhighlight %}
Happy documentation!